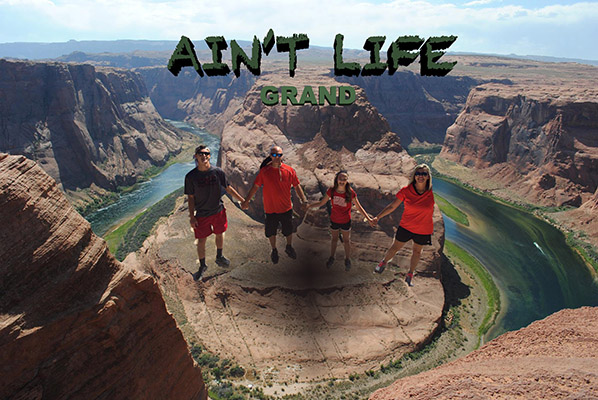
Image after Photoshop

Below is the process I used to edit my original family photo taken at the Grand Canyon and pasted it onto the photo taken at Horshoe Bend in the same trip. It was the only family picture we took the time to make and I was upset to not have one made infront of Horseshoe Bend. So thanks to Photoshop I was able to fix it. Below is the process. First, I right clicked the original photo and selected open with. I opened with Adobe Photoshop CC 2015.5 After that, I chose to use the magnetic tool to cut out me and my family just as I learned to do in Part One of the assignment. After selecting the magnetic tool I began clicking in small sections around the family until all were selected. I then chose Edit and selected cut. I made certain that the lock icon was not selected so that I could work on the Layer/Background. Next I chose another photo taken at Horseshoe Bend, near the Grand Canyon. I wanted to place our photo in that picture because it was so crowded there the day we visited we didn’t get to get a picture of us there. So I opened the photo again with Photoshop. Then I clicked on Edit and paste. The picture of my family appeared in the photo of Horseshoe Bend. The following three techniques were explored after watching tutorials of Photoshop online. They are as follows: I decided to use Text but a different technique in using the 3D approach so I added another layer at bottom right hand corner with page corner lifting icon. It was a bit complicated, but I went for it. I clicked on the T in the left column. Next, I selected the area of the photo where I chose to add Text. I typed in “Ain’t Life Grand” as a title of my photo. I chose two different fonts. After I clicked the 3D option in the left hand corner I chose the cubed looking icon that scaled the text and dragged it making “Ain’t Life” larger. I wrote “Grand” in another layer and chose a different font. All of the options can be found in 3D mode. There are so many options to try. I used the Eraser from the left hand column to erase my left arm. The person taking my picture cut off part of my arm in the picture. I thought it looked better after using the tool. This is the only picture we took time to make of our entire family on our Bucket List vacation and part of my arm was cut. Lastly I used the blur tool in the left hand column to blur the cuts from the magnetic lasso tool.